2 Methods for Digitizing Glass Negatives
Two Methods for Digitizing Glass Negatives
Digitizing glass negatives is a fairly simple process, and I will offer two methods you may find useful in this post. Last week, I talked about how to store glass negatives and gave some suggestions as to where to find the proper archival boxes specifically made for that. Once you’ve got the right storage materials, you can sit down and start digitizing. It is always important to have proper storage first so that artifacts are safe as soon as possible. Digitizing can be a project depending on how many glass negatives you have, and you may need to spread out the process over a few days.
First Method: Scanning
If you have a home scanner with a “transparency” setting, you may have very good luck scanning your negatives. If your scanner does not have a “transparency” setting, you may be able to scan some negatives, but if they are dark, they scans will likely not pick up the image very well.
To scan a glass negative, put on latex or nitrile gloves, and make sure the glass bed of the scanner is free of any dust or lint. Then make sure that the negative itself is free of dust and hair—you can use a blower to do that without harming the emulsion. Be VERY careful when brushing off debris on the emulsion side. The emulsion can rub off, which is why it is best not to brush that side. An archival dust blower is perfect for getting dust off without ever touching the glass and can be used on other items in your collection as well.
Once the scanner and glass negative are ready, place the negative emulsion side down onto the glass. Now, and important note here, is depending on your scanner’s point of focus, the image may be clearer with the emulsion side up—however, that runs the risk of creating distortion “rings” in the scan. You may need to try a negative both ways to see which turns out the best with your scanner.
Once the negative is on the glass, gently close the lid and take a look at your scanner settings. It is best to scan images at 600 dpi, although if you want to scan them higher, you certainly can. The best file format to save in is a TIF so that as much detail as possible is saved. This creates a much larger file size, but it also provides the richest data file. A JPG or PNG will compress the image, making a smaller file size, but also saving less information.
Second Method: Photographing with a Lightbox
This method is somewhat “old-fashioned”, but it will work well for glass negatives—especially if your scanner does not have a “transparency” option for scanning darker negatives.


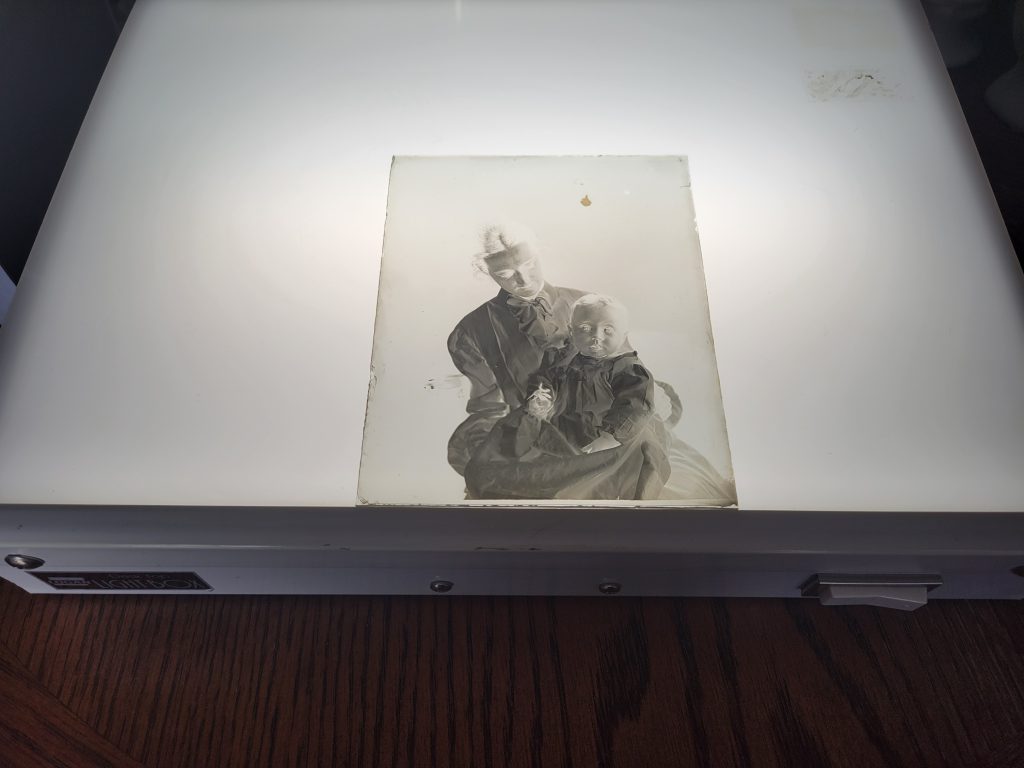
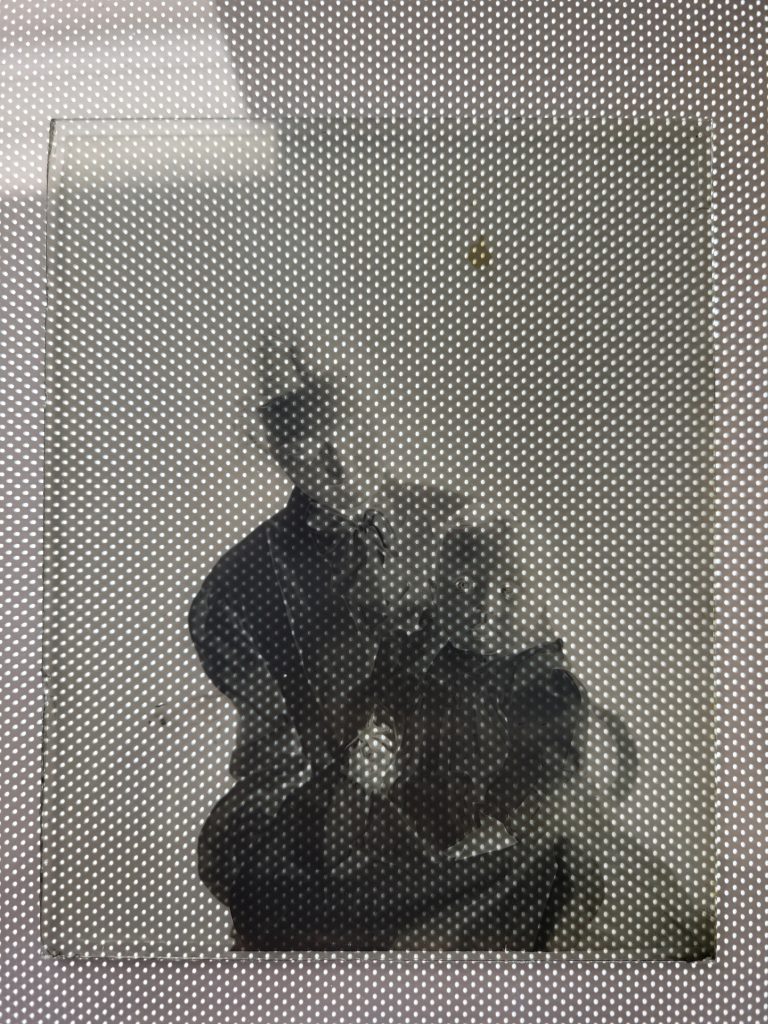
The first steps are the same as with the scanner—make sure your lightbox and negative are free from dirt and debris, and make sure you are wearing latex or nitrile gloves. Then place the negative on the lightbox and photograph it. One important note here is to be careful of the lightbox you are using. I used a large lightbox that I saved from the old photo lab I worked at that shut down almost 20 years ago. It still works like a champ! But there are new LED ones available online that when they light up, actually create a dot matrix pattern. You do not want one of those LED ones because the black dots will show up in your photograph of the negative.
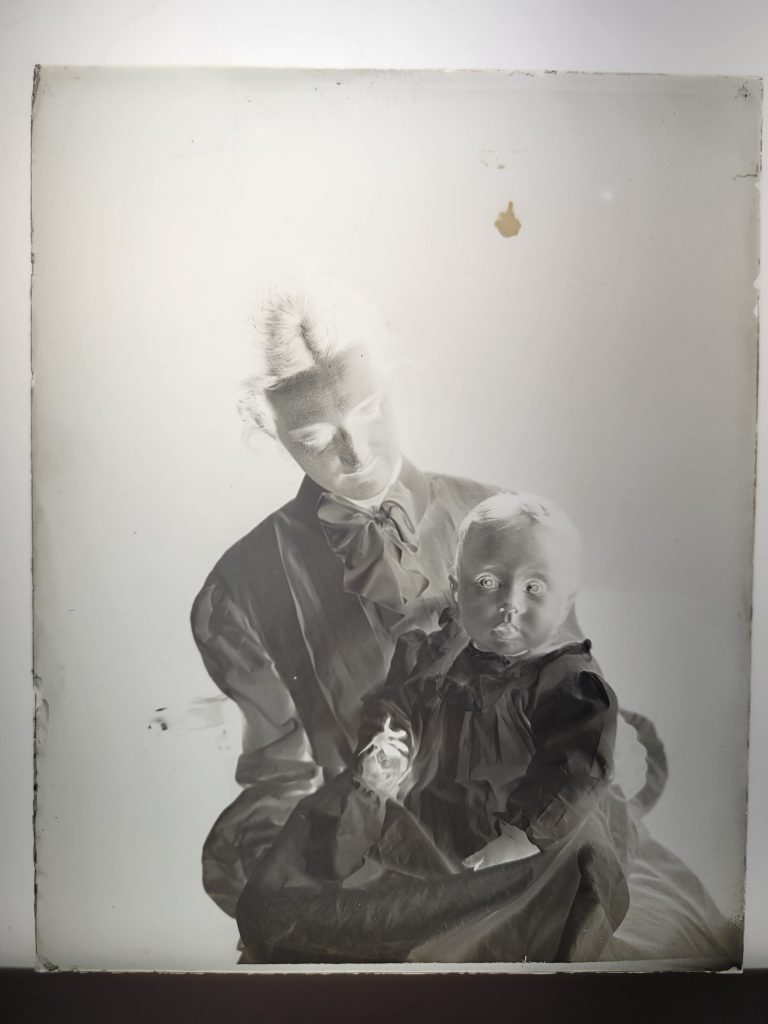
In this example I used both my cell phone and a Canon EOS Rebel camera to photograph the negative. The cell phone picture came out rather well, although it is in the JPG format. The camera also did very well, but it takes some practice to make sure that you photograph the image squarely from the top looking directly down so that you don’t end up with a slightly distorted picture.
Processing Your Picture

Once you have your digital file of the glass negative—whether from scanning or photographing—you’ll need to process it in some kind of photo software. You can use Adobe Photoshop, or any other myriad of photo editing programs to do the basics of what we need to do here. I use Affinity Photo for these types of edits.
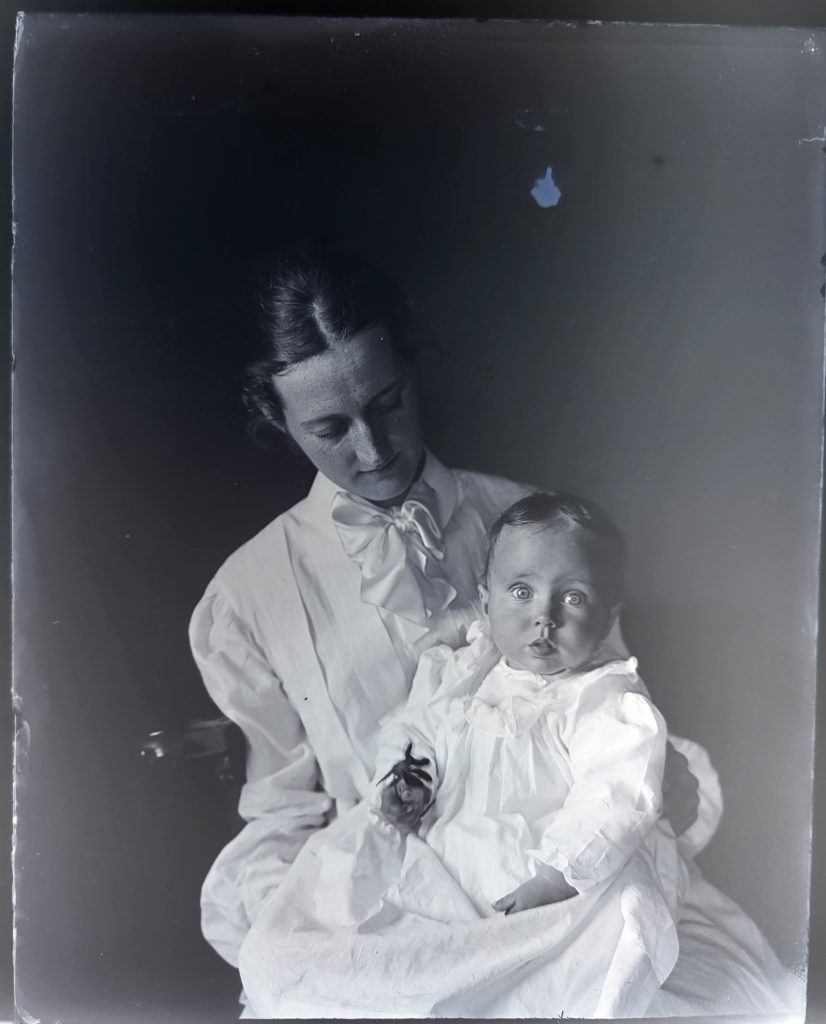
Open the file in your photo editing program of choice, and then add a layer, and select “Invert.” This will invert black into white and white into black so that you have a positive image, rather than a negative. Once you do this, you will likely need to edit some of the black and white levels. This can be done by adding another adjustment layer and selecting “levels.” By adjusting the black and white levels on the histogram that pops up, you will be able to create a more natural looking image with proper color balance.
An important note here is that some images will be naturally dark and naturally light. Just like back in the “old days” when we’d take pictures with a roll of film, sometimes they were over or under exposed. In that case, there is only so much editing you can do with a photo program to get the best image.

Once you have a finished image you are happy with, you can save it as a new file as a TIF or a JPG—whichever you prefer for your use. I always keep an edited TIF on hand and use a JPG for posting online or sharing via email since the file size is so much smaller.
I hope that this brief walkthrough helps give you some pointers on digitizing your glass negatives!

